Free Hosting

Web hosting

Monday, May 2, 2016

Create a Drop Down Menu In Blogger

A drop down menu is needed when you have too much content on your blog or you love keeping things organized. To add a drop down menu to your blogger blogs do this:
Go To Blogger > Design > Page Elements
Select a HTML/JavaScript Widget just under the header and paste the following code inside it,
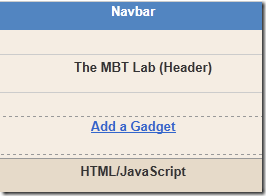
drop down menu

<div id='mbtnavbar'> 
      <ul id='mbtnav'> 
        <li> 
          <a href='#'>Home</a> 
        </li> 
        <li> 
          <a href='#'>About</a> 
       </li> 
        <li> 
          <a href='#'>Contact</a> 
        </li> 
  <li> 
           <a href='#'>Sitemap</a>
            <ul> 
                <li><a href='#'>Sub Page #1</a></li> 
                <li><a href='#'>Sub Page #2</a></li> 
                <li><a href='#'>Sub Page #3</a></li> 
              </ul> 
        </li>
      </ul> 
    </div>
Replace # with your Page Links and the bolded text with relevant page names. The yellow highlighted code is responsible for the drop down menu. You can copy and paste it under any tab you want just before </li>
To add another tab just paste this code above </ul>
<li> 
          <a href='#'>Tab Name</a> 
        </li> 
 3.   Now Go to Design > Edit HTML
 4.   Backup your template and search for ,
       ]]></b:skin>
     3.   Just above it paste the code below,

/*----- MBT Drop Down Menu ----*/

#mbtnavbar {
 
    background:
 #060505; 
    width: 960px;
 
    color: #FFF;
 
        margin: 0px;
 
        padding: 0;
 
        position: relative;
 
        border-top:0px solid #960100;
 
        height:35px;
}

#mbtnav {
 
    margin: 0;
 
    padding: 0;
 
}
 
#mbtnav ul {
 
    float: left;
 
    list-style: none;
 
    margin: 0;
 
    padding: 0;
 
}
 
#mbtnav li {
 
    list-style: none;
 
    margin: 0;
 
    padding: 0;
 
        border-left:1px solid
 #333; 
        border-right:1px solid
 #333; 
        height:35px;
 
}
 
#mbtnav li a, #mbtnav li a:link, #mbtnav li a:visited {
 
    color:
 #FFF; 
    display: block;
 
  
 font:normal 12px Helvetica, sans-serif;    margin: 0; 
    padding: 9px 12px 10px 12px;
 
        text-decoration: none;


}
 
#mbtnav li a:hover, #mbtnav li a:active {
 
    background:
 #BF0100; 
    color:
 #FFF; 
    display: block;
 
    text-decoration: none;
 
        margin: 0;
 
    padding: 9px 12px 10px 12px;


}
#mbtnav li {
 
    float: left;
 
    padding: 0;
 
}
 
#mbtnav li ul {
 
    z-index: 9999;
 
    position: absolute;
 
    left: -999em;
 
    height: auto;
 
    width: 160px;
 
    margin: 0;
 
    padding: 0;
 
}
 
#mbtnav li ul a {
 
    width: 140px;
 
}
 
#mbtnav li ul ul {
 
    margin: -25px 0 0 161px;
 
}
 
#mbtnav li:hover ul ul, #mbtnav li:hover ul ul ul, #mbtnav li.sfhover ul ul, #mbtnav li.sfhover ul ul ul {
 
    left: -999em;
 
}
 
#mbtnav li:hover ul, #mbtnav li li:hover ul, #mbtnav li li li:hover ul, #mbtnav li.sfhover ul, #mbtnav li li.sfhover ul, #mbtnav li li li.sfhover ul {
 
    left: auto;
 
}
 
#mbtnav li:hover, #mbtnav li.sfhover {
 
    position: static;
 
}
#mbtnav li li a, #mbtnav li li a:link, #mbtnav li li a:visited {
 
    background:
 #BF0100; 
    width: 120px;
 
    color:
 #FFF; 
    display: block;
 
   
 font:normal 12px Helvetica, sans-serif; 
    margin: 0;
 
    padding: 9px 12px 10px 12px;
 
        text-decoration: none;
 
z-index:9999;
 
border-bottom:1px dotted #333;
   
 
}
 
#mbtnav li li a:hover, #mbtnavli li a:active {
 
    background:
 #060505; 
    color:
 #FFF; 
    display: block;
     margin: 0; 
    padding: 9px 12px 10px 12px;
 
        text-decoration: none;
 
}

Tuesday, April 26, 2016

Upgrade Google Adsense Hosted account to Non Hosted account

Sometimes people start their blogging journey by blogger,youtube etc in that time the AdSense account they are linked called hosted account.More about Adsense hosted & non-hosted account difference.In future when they know about WordPress they just love it &  start blogging simpler with WordPress.
Now they want to show ads on their website but in Adsense, there is a restriction to use multiple accounts.You can use only one Adsense account,then you can convert your Adsense hosted account to non-hosted account.Google  needs to see ad code on your new website.
Adsense Account Types
There are three types of AdSense account
1.Hosted Account:This account is used on blogger & youtube only.
2.NonHosted Account:Shown ads on any type of own domain.
3.Business Adsense Account :For webmaster & the website with huge traffic.
Before apply Adsense  check reminder note
Steps To Follow
Log in to your AdSense account on the right side red colour you find Hosted account.

Click on setting options gear icon.
adsense host to non host 2


 In access & authorization section you find site information.
adsense host to non host 3


In I will show ads on section you can add your own domain URL & submit,such as http://www.domainname.com 
adsense host to non host 4


Now click on My ads then create an ad unit.Name & customize ad unit.Check and View the details about the settings done.Click on Save option and get the code.
adsense host to non host 5


Now place the code on your new website & continue.
Note:Adsense will review your request & approved or reject depend on your website quality traffic performance etc,its takes some days or some week.After that, you will receive an email of approval or disapproval.Don’t worry in case if it is rejected  you can use existing Adsense hosted account.

Monday, April 25, 2016

How To Save Adsense From Disabling?

Hello Friends,
         Today I Will Show You Some Ways To Make your Adsense Safe From Disabling In A Easy Way.
So, Let's Start The Toturials :-

1.Do not trade click with anybody.

2.Do not advise your companions to click numerous time on your google promotions in light of the fact that if numerous snaps originates from same IP or same pc then additionally your google adsense record will be boycott.

3.If you have 3 Ads in one page of your website then it will be pleasant however in the event that u put all the more then required promotions in your site page and client can't read content then it have additionally more prominent opportunities to boycott you adsense account.

4.Post just new substance on your site or blog don't duplicate others.

5.Make guests amicable promotions in your site or blog by supplanting your advertisements code in appropriate spot.

6.Dont make your guests power to tap on your advertisements.

7.Don't make adsense advertisements pop in another tab it disregard adsense terms and conditions so on the off chance that you do as such then your adsense record will be blocked.

8.Properly tail every one of the tenets and regulation by google adsense.

9.Don't make such a domain, to the point that damages google adsense terms and conditions.

10.Don't bye guests and snap from any website they just said genuine human clicker yet they tailed some illicit traps to send snaps and guests in your site or blog this might be perilous for your adsense.

11.Don't change your IP address and tap on google promotions.

11.Don't utilize VPN and any others traps likewise to tap on your adsense advertisements.

12.Be safe from your foe else they will click commonly on your adsense promotions to make your adsense account boycott .

13.Keep personality a main priority adsense have tight security on it on the off chance that you do any extortion or unlawful work on adsense to gain high cash they all of a sudden know it and after that they will boycott your adsense account.

We Think these much data is sufficient for you to make your adsense account safe on the off chance that you require any assistance or in the event that you have any grievance on these article then you can without a doubt remark beneath.

Wednesday, April 20, 2016

How to Upgrade Adsense Hosted Account to Normal Account?

adsense hosted account
Google is getting strict day by day. They changed their policies recently.
The big one is Adsense Hosted Account..
So What is Adsense Hosted Account?
The account that you got approved from their hosted sites like YouTube, Blogspot or Hubpages.
That mean if you got Adsense using the Adsense hosted sites like youtube, blogspot or hubpages. You can’t use this Adsense account on any other domain name/site.
Let me tell you the difference between Adsense hosted account and normal account
  • Adsense Hosted account: You can show Adsense ads using this account only on Youtube, BlogSpot, Hubpages (Sites which let you apply for Adsense and use ad codes on their domain)
  • Normal Account: You can use this account on any Sites/Domain owned by you.
adsense hosted account
This is the one and only difference between the normal Adsense account and the AdSense hosted account.
You’ve to remove the label Adsense hosted account in order to show ads on any other site/domain.
Here is how to do that.
You can do so by filling a form , Google will manually review your application and website. They’ll upgrade your Adsense account to normal.
Few things to remember:
To upgrade Adsense hosted account to normal account. You need a quality website. Google is not going to approve any spammy blog or the one with poor content.
We’ve wrote a complete detail article on tips before applying for Adsense. Here are some quick tips you must follow before requesting Google to upgrade your Adsense hosted account to normal account.
  • Add important pages in your blog like: About us,  Privacy Policy, Contact Us
  • You must be 18+. So Make sure to use the payee name same as on your bank account
  • Apply using a top level domain like .com , .net, .org
  • Write quality content and optimize it for search engines
  • Make your website fast loading.
  • Use good looking themes, I prefer Elegant Themes
Here is how to remove Adsense Hosted Account label

  • Sign in to your AdSense account.
  • On the Home tab, visit the Account settings page.
  • In the “Access and authorization” section, next to “Only host sites are allowed to show ads for your account,” click edit.
adsense hosted account
  • On the “Show ads on other websites” page that appears, enter the URL of the site where you plan to show ads.
  • Click Submit.
Now after submitting the application, you’ve to add the adsense code in the blog you submitted in above step.
Here is how to do.
  1. Sign in to your account. Visit the My ads tab.
  2. From the sidebar, choose  “Content.”
  3. adsense hosted account
  4. Click +New ad unit.
  5. In the next step Name and customize your ad unit.
  6. View details about the settings.
  7. Click Save and get code.
Now place that code in your blog that you submitted in the step mentioned above.
Google will manually review your application. It can take few days to week.
You’ll get email about approval or disapproval.  Even if your Application is rejected, don’t worry. You will be able to use Adsense on Hosted sites like Blogspot or Youtube.
Are you using Google Adsense? Is it Hosted or normal account?
If you have any other questions, feel free to ask me in comments.

Sunday, April 17, 2016

how to create a free apple id for Nepal

how to create a free apple id for Nepal is a full guide to create a free apple id without credit or debit card forfor free in Nepal for Apple devices like iPhone, iPad, iPod, Mac, etc.create free apple id for Nepal, here are the steps that you can follow to create your own Apple ID in Nepal or any other country without credit card.

                       Click Here if you want to create free apple ID of US AppStore
http://nepalitrend.com/create-free-apple-id-without-credit-card-2016-new/


As we all know that the Central Bank of Nepal does not allow Nepali citizens to carry dollar within Nepal,
as a result we do not have credit cards which allow us to pay worldwide in dollar.
    As the period has come over to the generation of iPhone and i Pad, we all have phones and pads with us, but in order to download any application we need to have apple ID, it enables us to download the applications from the app-store.
    Since people are having trouble creating their own free apple ID, i have mentioned the steps and process to create apple ID for free. I am teaching to create apple ID form desktop/laptop.
Requirement
 i) You must have iTunes installed in your computer.
ii) You must have active e-mail address.
iii) Working Internet connection.

Create Free Apple id For Nepal

Open iTunes and
1> CLICK "iTunes store"...(Top Left)

2> In 'search store' box type 'VLC' and Press enter.

3> When VLC appears click 'free' button (left bottom corner)
  4> Now, iTunes will ask for apple id. click on 'create apple ID'.

5> Page appears 'welcome to the iTunes Store'. Click on 'continue'(bottom right).

6> 'Terms and conditions and Apple Privacy Policy' page will appear. Check mark the 'i have read and agree to these terms and conditions'. Click on 'Agree'.

7> Page appears as 'Provide Apple ID details'. Fill all the required information.Note that your password should consist of Uppercase, Lowercase and number. For example.. FRONTNAMElastname67. and your email id must be a valid email ID ( i.e working one).

8> Page appears as provide a payment method. Click on the option 'none'.

9> Now fill up the 'Billing Address', your F.Name L.name, Street, district/Province,postcode/ZIP ( i.e-> 000977 for Nepal ), enter your Phone no. ( Land line Phone no. works better). then click 'Create Apple ID'.

10> 'verify Your apple ID'... Go to your email inbox and check the apple mail and click on the link provided in the e-mail.

Now you have your Own Apple ID, you can download apps for iPhone, iPad, iPod Touch.


    This apple ID enables you to purchase free apps only. In order to purchase paid apps you need to buy and redeem apple gift card. These apple gift cards are like Top-up cards (recharge card for mobile), after redeeming the apple gift card your apple ID will be credited by US Dollars and then you will be able to purchase paid applications form app-store.
   to Purchase a iTunes Credit please contact me
   To unlock iPhone contact me

Friday, April 8, 2016

Make Amazing Online Money From Nepal

NOTE: Read each lines carefully to make your concept clear

Before coming to the point, let me draw your attention, I am making almost 130$ to 140$ monthly since last six months and rising. I am IT student, you may get surprised, I only give daily 1.5 hours for my online assets, and I'm making petty well money for some personals. These are some proofs of my earnings:


I do not know anything, How can I start? Can I make it?
The simple answer is Yes ! Anyone can make earning online, you need not to be expert, but you must make the clear concept of making money. Here, I will try to help you out to make some money from Youtube, Blog and Website. Getting Adsense approved in South Asian countries is too difficult, after reading this post, you will make it only in 2-5 hours :) 
Adsense is not the only task, its the beginning of your online earning source, it depends on your patient and your dedication.

Procedure:
Setting up Gmail:
Create a new Gmail account, you gonna need this forever. While signing up, select location to United States. Later, if it asks for verification, you may use your local phone Number (Ncell, NTCetc.) Once you create it, you will have access to all Google products with the same Gmail. 


Create a Youtube Channel:
After creating your Gmail, go to Youtube, sign in with the Gmail you created earlier. Now all you wanna do is create a new Youtube channel, once you create it, go to Dashboard of the channel and go through Channel>Advance and Make sure the location is United State. Save it !


Now enable Monetization as shown below:


Your youtube will be eligible for your monetization, once you come to this point


Setting Up Adsense(The main Step):
Signup for your Adsense account to show advertizement in your videos.
Proceed with the same Gmail you created earlier while signing up. Adsense is the platform that makes your payments for your monetized Youtube videos, always provide accurate information about you, your location, postal code and your phone number. If you are unable to provide your correct info, be sure, you will never get paid. Adsense sends you Post mail time and again with Pin code to your address to make sure of you.
(To find your postal code, Click here)

Now you are almost done, you will receive email in your Gmail Inbox within 2-6 hours, saying something like "Your Adsense Account have been Approved".


What now?
Now start making quality uploads in Youtube, views and subscribers will increases significantly if your topic is interesting focused to a theme. Think about topic that might draw public attention and upload it. Make as many upload as you can regularly. However, never upload copyright contents, third party materials or adult stuffs to Youtube, if you do, you will get permanent suspension for your account i.e. you can only upload your own original contents.
Youtube can see one of my Youtube channel and learn from those uploads:
Please subscribe me too :)

How much Adsense pays me for a view or for 1000 views?
Adsense is CPC network, that pays you per click (Cost per Click) to the advertisement. However, CPC rate depends upon the country where the video is being viewed. If your videos is viewed from USA 1000 times, Adsense pays you almost 3-5 $ however, CPC is low in south Asian countries like Nepal is low, in average, 1-2$ per 1000 views ! or you can make your own calculations, I was paid 140$ last months for 150,000 views. 

What is the payment threshold?
The payment threshold for Adsense is 100$, however you can expand to higher amount if you wish. Simply, Adsense only makes you payments at 20th to 25th of this months if your revenue reached 100$ last months. 

How do i get paid?
You will get paid through Western Union. Once you reach your payment threshold, they will send you WU pin to your Adsense account  on 20th to 25th, you can withdraw it from nearest WU agent, you will need your Citizenship as a identity.

Is Youtube only source of making money in Google network?
Nope, you can create a blog, website, whatever you like, with your same Adsense account. However, as per my opinion, Youtube is the best platform.

Do you Wanna Pay Me?(only Nepal)
If you cannot make it out, or if wish to pay me some to get your Gmail, Youtube channel and Approved hosted Adsense, I can do it for you. You can pay me 300RS. as a consideration, however, the task is simple and you can make it out easily by yourself. I am not here to make personal promotion. LOL
If you wish, you can contact me, Click here

If you are still having trouble, you can make your Facebook comments below with your problem, I will try to get you rid of it.